So sorry it has taken me this long to post these directions! I've been exploring Arkansas with my husband whose on his vaca this week!
Now, lets get started!
1) Lay your t shirt flat and cut the sleeves off just inside the seams.
2) Next use a yard stick or other straight edge to draw a line across the top of the t shirt right under the collar ribbing as pictured or you can use a rotary cutter to just cut along beside the yard stick.
3) The tshirt should now look like the photo below.
4) Now you roll the raw edges of the armhole area under 1/4 inch and then again another 1/4 inch to the inside of the shirt and stitch the edges of each armhole as I did in the pictures below. I used black thread so it could be seen better in the picture. You would want to use the color thread that matches your shirt.
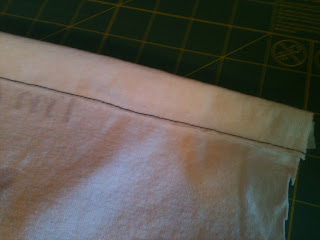
5) Almost done!! Now you are going to stitch the straight edge across the top of the shirt in the front and again in the back. You fold under the raw edge about an inch to the inside (more if your ribbon is wider). I like to use 3/4 inch or 1 inch wide ribbon. Again I used black thread in the picture to be more visible.
6) Lastly, put a safety pin in the end of the ribbon.
Feed it through the open end of the front top seam, out the other end of the front and then into the back open end seam on the same end you just exited in the front and out the opposite back side which is the same side you began. You will tie the 2 loose ends of ribbon in a bow on this side. I use 2-3 yards of ribbon and then trim it down after I put it on for the first time to make sure my bow is the size I want.
And that's it!! Your finished! The top of the shirt should look like the above picture.
Here we are in our I Teach K shirts! This is also great for school team shirts during those hot August football games!
Check back next week for my post about my chalkboard fabric projects!!!!!


No comments:
Post a Comment